Adding Users
Get started with adding users to Kintone.
Unlike the procedure to invite users from the screen that appears the first time you log in or during the free trial period, the procedure described here can be used to add users anytime.
You can add users even if you haven't registered any departments. You can also always add departments later on, after adding users. For details on how to add departments, refer to Adding Departments.
-
Click the Settings icon (the gear-shaped icon) at the top of Kintone, then click Users & System Administration.
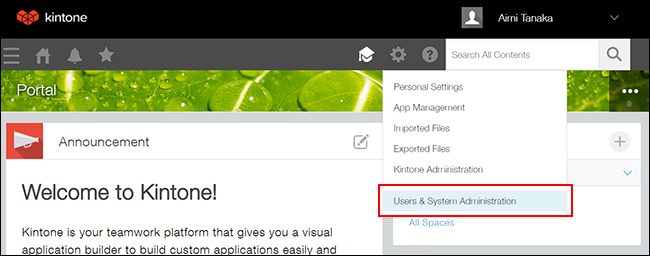 The "Users & System Administration" screen appears.
 -
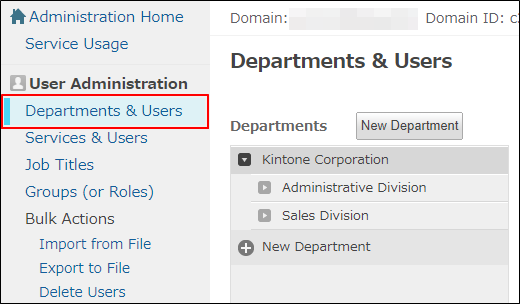
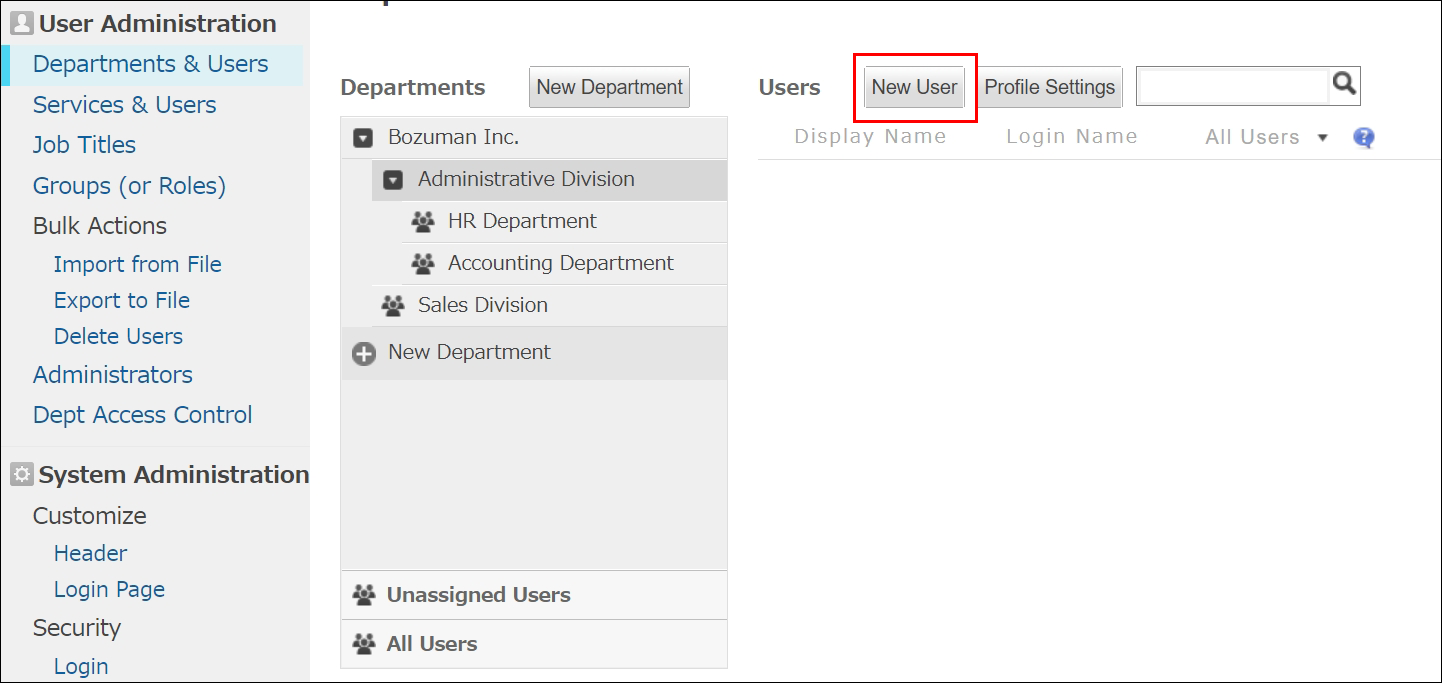
Click Departments & Users under User Administration.
-
Make one of the selections below, depending on whether or not you want to set a department for the user. (You can also change or set a user's department after adding them.)
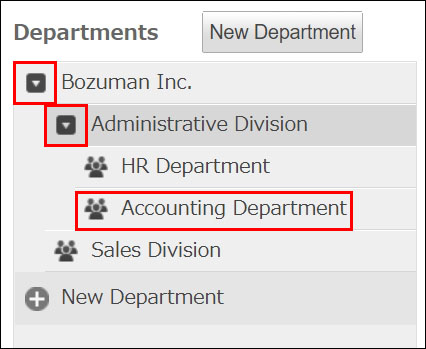
- If you want to set the user's department: Expand the department tree and select a department.
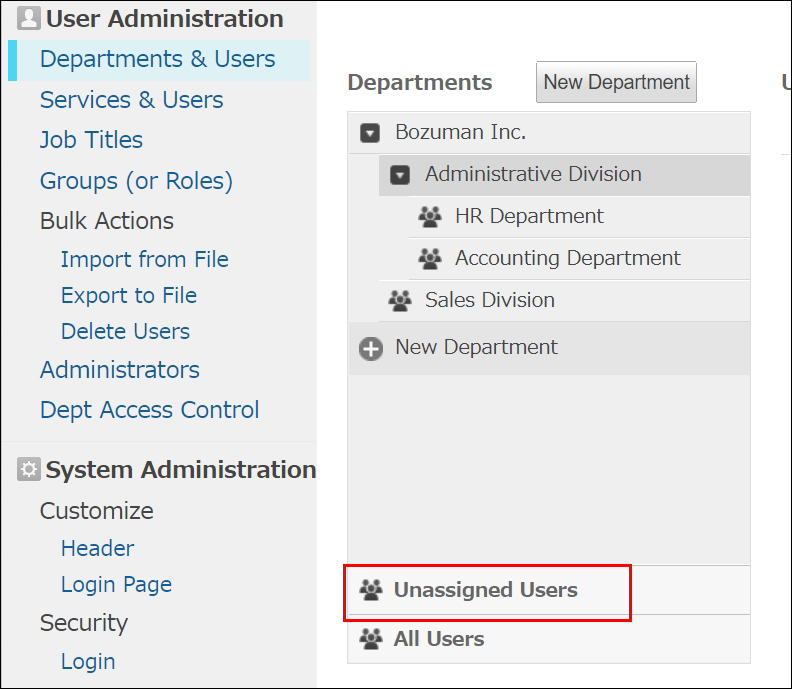
- If you do not want to set a department for the user: Click Users Not Yet Assigned.
- If you want to set the user's department: Expand the department tree and select a department.
-
Click Add User.
-
Configure each item.
- Profile Picture:
Select an image file of 800 KB or less in size. The following image file formats are supported: GIF, JPEG, PNG, and BMP. - Name:
- Display Name (Required):
Enter the user's name to be displayed on Kintone. - Given Name, Surname:
Enter the user's surname and given name. - Phonetic Surname, Phonetic Given Name:
Enter the pronunciation for the user's surname and given name. (Japanese only)
- Display Name (Required):
- Login Name (Required):
Enter an ID to be used for logging in to Kintone. For details on characters and symbols that cannot be used in login names, refer to Characters That Can Be Used for Login Name and Password. - E-mail Address:
Enter the user's e-mail address. The e-mail address specified here will be used to receive notification e-mails from Kintone and to reset the password in the case where the user forgets it. Do not specify a shared e-mail address for this item. - Status:
You can switch the service usage status. Clicking the status button switches the status between Active and Inactive. - Available Services:
This section displays the services that are available with your license and the services for which you have signed up for a trial. Make sure that the checkbox for Kintone is selected. - Department(s):
Set the user's department and job title. For details on how to add departments or job titles, refer to the following pages.
Adding Departments
Managing Job Titles - Priority Department:
Select the department that will be given priority to be displayed on the user's screen if they belong to multiple departments. - Phone:
Enter a phone number for the user. - URL:
Enter a web page URL for the user.
For details on the items in the Optional section, refer to Items of User Information.
- Profile Picture:
-
Click Save.
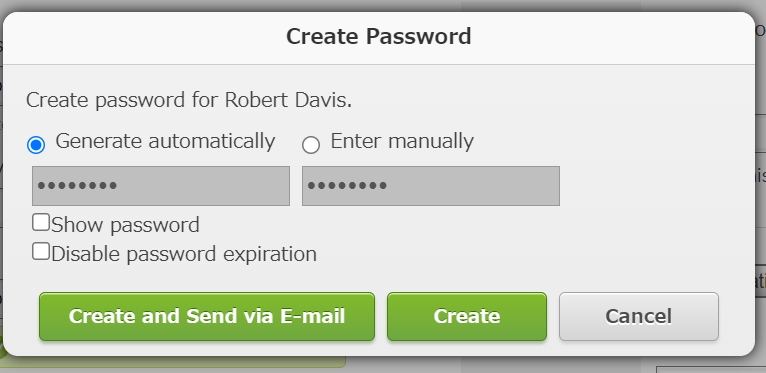
 The Create Password dialog will appear.
 -
Set the user's password using either of the following methods.
- If you want to use an automatically generated password: Select Generate automatically.
- If you want to set a password manually: Select Enter manually and enter a password.
-
Select a method for notifying the user of their password and how to log in.
- If you want to notify the user by e-mail: Click Create and Send via E-mail, enter the user's e-mail address and a message, then click Send.
- If you do not want to notify the user by e-mail: Click Create. After doing so, inform the user of the following information.
- Access URL of Kintone (Example: https://subdomain-name.kintone.com/k/)
- Login name
- Password